Tuesday, January 27, 2026

Frozen, Thawed Raspberries In Pie


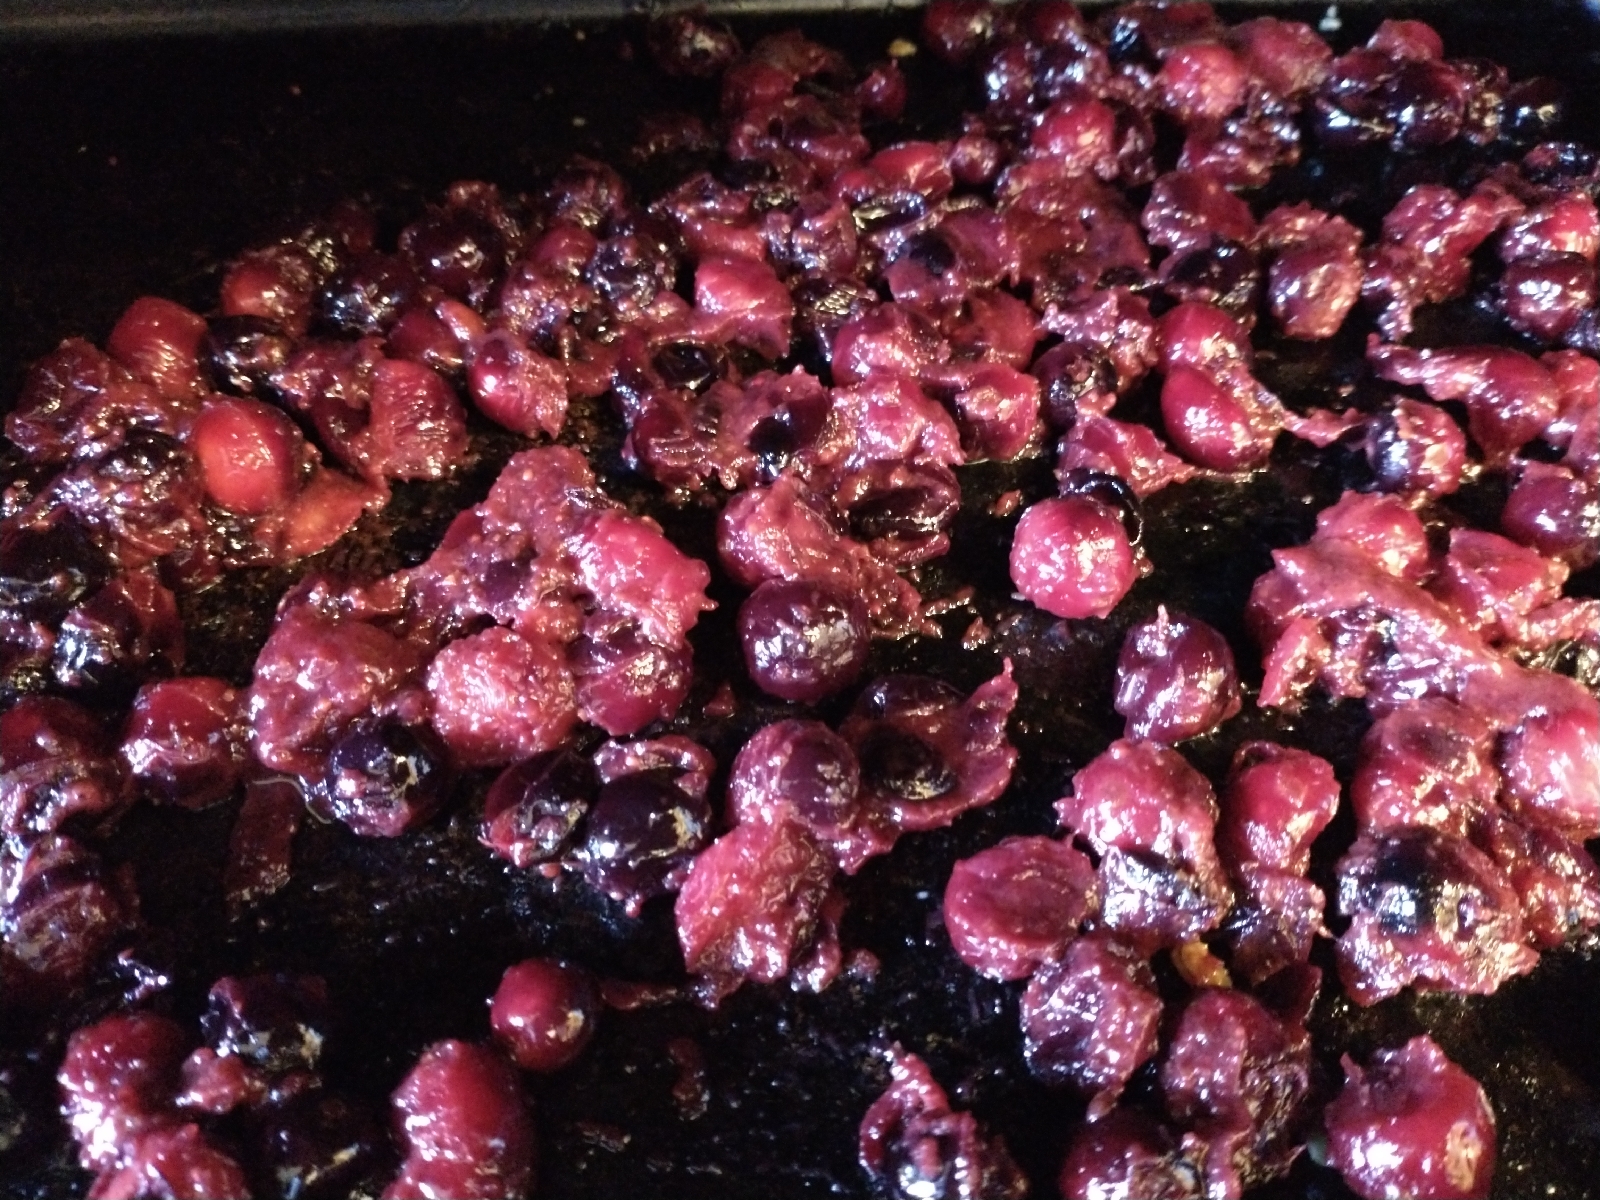
The photo above is from the second attempt at using up thawed berries.

Last week, I realized too late that my gardening friend's gift of raspberries should not have been thawed, but rather should have been frozen until time to mix them with the other pie filling ingredients just before baking.


My husband and I have reached the age where we rarely eat desserts. Well we confess to regular ice cream portions and 90 percent chocolate pieces.  So maybe I should revise that to say, we don't bake much any more.

However, we invited close friends over for dinner and thought it would be a good time to use the gift of raspberries.

So these instructions are how to "SAVE" or recover from the mistake.

And besides this  comedy of errors, it has been a long, long time since I made a pie.  The small can of Crisco expired 6 years ago.  Besides the age, it also smelled bad so into the garbage it went.

Side note, I have been cleaning out the pantry because our children have threatened to play a game about who can find the oldest item in their parents' pantry.  I am determined to get there first.

We had already been to the store that day and didn't want to make another trip.  We keep butter in the freezer, so decided to use only butter for the crust.  Maybe someone knows how to adapt this, but not me.  I measured out the same amount of butter as if I had used part Crisco.  And on top of that, the butter was frozen.

This was just going to have to fail, that's all there is to it.  Maybe by documenting this I can avoid a repeat.  That is a maybe.

The frozen butter was cut into small slivers so I could get the pastry cutter thru it.  It still turned out too dry and would not stick together.  Added water.

For goodness sake,  it was tough as "all get out" to roll out and did not bode well for eating.

Sure enough it was too tough to cut or chew.

My husband went to the store to buy mini ice cream bars for dessert.  That was one way to save the day.  Bless him.

Once dinner was over, I mentioned there was a choice to be made; failed raspberry pie or ice cream bars.  Our guests chose the raspberry pie and bravely ate it, though we mostly left the tough crust behind and ate the filling which resembled raspberry jam. 

And when I confessed to almost throwing it in the compost pile, they were nice enough to object and took the remaining pie home.  Thank goodness!  They are true blue friends.

No photos were taken.  This was not one of my better moments.

The next morning I had a visit with my 97 year old aunt who is quite in her right mind and willing to share the good old days.  Her mother (era 1901 to 1977) was an expert pie maker.  She was a homesteader/farmer's wife and mother of many with a constant round of guests at her table (including depression plus war years).

Her story was that their family regularly slaughtered hogs and rendered the fat, so there was a dependable source of fresh lard.  Her pie crusts were made of lard, not butter.  According to my aunt, her mother's pies were tender, flaky and she whipped them up in nothing flat baking them in the wood stove.  The first electric stove in their home was in the 1950's.  She much preferred to cook on her wood stove even after acquiring the electric one.

My husband bought lard the next day rather than start a pig farm.


Now it is a few days later and extra pie filling still sits in the fridge. And now I have read the AI instructions on the Internet and added an idea of my own (steps one and two).

1. Strain the juice (about 2 cups) from the thawed berries and thicken (stove top) with two tablespoons all purpose flour.  No photo taken.

2. Mix the soggy smushed berries with the thickened sauce and all the ingredients called for in the "fresh recipe" including the full amount of flour.

3.  Bake the bottom pie crust 7 minutes at 450 degrees before adding the berry mixture.

4.  Bake the pie at 375 degrees for an EXTRA 15 minutes.  Be sure to protect the crust from burning with tin foil or a silicone guard.  Turn up to 450 degrees for the last 10 minutes of baking.

Here is the pastry crust recipe on the lard box:

Before starting I put 7 Tablespoons water in the freezer for quick cooling.  It was way too much.

Next photo shows the 7 minute baked shell.


This is where I will add today's experience in which this pie dough made of lard was tender and easy to roll out.  Wow!  What a difference from the other day.  The pie is cooling as I blog, but it seems promising.  What I can recommend is trying the difference for yourself as it is so striking.  But that would mean wasting good food, so better to take my word for it.

And here is the original "fresh" raspberry pie recipe:

4 cups fresh raspberries 
1 cup sugar
1/4 cup all purpose flour
Juice and zest of half lemon
1/8 tsp sea salt

1 tablespoon butter

Mix fresh berries, sugar, flour, lemon juice/zest and salt.

Put berry mixture in unbaked pie crust, dot with butter.  Cover with top crust (slits) sprinkle with a half teaspoon granulated sugar.  Set the pie pan on a cookie sheet to catch drips.  Cover crust edge with silicone ring or tin foil.  Bake at 375 for 45 minutes.  Remove from oven to cooling rack.  Do not cut until completely cool (preferably refrigerated)or the filling will run out.

I appreciate my sister 's humor when she said I could be the worst pie day competitor.  She makes great pies herself and I continue to be full of admiration.

Tuesday, November 16, 2021

Chicken Lentil Soup

Made for a friend who has a sore throat.  A medicinal soup.

In 
1/4 cup bacon drippings

Saute briefly:
1/2 cup chopped celery
2 Tablespoons mashed, rested garlic
1 Tablespoon mashed ginger root


Add
5 cups water
1 cup green lentils
6 Tablespoons chicken broth
1 teaspoon Jacobsen Sea Salt
Gently boil 30 to 40 minutes until lentils are softened.

Add and warm
3 cups roasted chopped carrots
2 cups roasted, chunked chicken
2 Tablespoons Worcestershire Sauce

Serve hot.  About 6 or 8 servings.  May need to add salt.

Saturday, September 4, 2021

Delicata Squash, Roasted


Delicata squash is ready for harvest so I decided to experiment with one.

I separated the seeds and coated them in the same oil and spices used to coat the squash.

Cut the squash in half lengthwise, scoop out the seeds and then cut squash in 3/4 inch slices.

Coat squash slices in about 1/8 cup olive oil, 1/8 cup pure maple syrup, salt, pepper and cinnamon to taste.

Roast at 425 degrees for 30 minutes.

Meanwhile, gently roast the coated seeds.

Once the squash and seeds are ready, toss together and garnish with French thyme.

On a rare occasion I have currant tomatoes.  Today is one of those days.


Thursday, August 5, 2021

Basil Lemon Parmesan Pasta Salad


Zest of 2 lemons
6 tablespoons fresh squeezed lemon juice
2 crushed garlic cloves
1 tablespoon coconut aminos
1/2 cup white wine vinegar
1/2 cup olive oil
Salt, pepper
2/3 cup toasted pine nuts
2 lbs bow tie pasta, cooled
2 cups fresh basil snipped small
5 ounces grated parmesan cheese

Mix the dressing together in large bowl while cooking pasta.

Combine cooled pasta with dressing.

Snip and add basil and parmesan and stir to combine.

Refrigerate for at least two hours before serving.  Add pine nuts and serve cold.

Tuesday, June 22, 2021

Rose Lemonade With Maple Syrup


Someone important to me wanted rose lemonade today but the usual source did not deliver.

Since the heirloom rose Ebb Tide is abundantly producing roses it seemed like a good idea to experiment.

I ended up with 3 cups washed rose petals.  In the next photo you see them soaking in alkaline water weighted with a cereal bowl.

 
Next up was 6 cups of water set to boil.  Once the water boiled the 3 cups of petals went in.

And very soon it looked like this:
Which is not attractive.

But leaving it to cool slightly then straining...

...then adding 3 tablespoons lemon juice, it turned to this....

This took two times because the 4 cup measuring dish was too small.

But in total, it took 6 tablespoons lemon juice.

In each of the fancy bottles left over from previous purchases, I combined 

1/2 cup cold water
1/2 cup rose water
2 tablespoons lemon juice from concentrate
1 tablespoon maple syrup

They are in the fridge for later.

Today she wanted some as she went out in the heat to work.

Since the two bottles are still warm, I made another batch in a glass, added ice and sent her on her way.

Well she poured it all into a travel cup to be more accurate.

It is a bit watered down with the ice, but now that the rosewater is cooling in the fridge the next batch should be great.

I prefer less sweetness and maybe one tablespoon maple syrup per bottle is too little for some.  Easily remedied by adding to your taste.

This turned out more peach colored than the original product.  But in reviewing the ingredients there is beet juice and no rose water,  just rose oil.

And beet juice is a great color even when diluted.


Monday, June 7, 2021

Rose Petal Jelly using Ebb Tide David Austin Heirloom Roses


Two years ago I made rose petal jelly. Using a slightly different recipe.   I like the other recipe better as it uses less sugar. There is a post about it (June 18, 2019) but I want to do another one anyway because it is such a special thing to make and eat.

And oh the scent and flavor.  Lovely!

Rinse 7 roses and pull off the petals.  This should add up to one cup.  I made it a heaping cup.

Add the petals to 3 cups cold water in a sauce pan and bring to a boil.
 Very shortly they will lose their color.
 Set the pan off the heat and rest 10 minutes.

Strain the juice.  Press the juice from the petals.
Add 3 tablespoons lemon juice and immediately the color looks better.
The three cups of juice goes back in the pan.  Bring back to a rolling boil that stays boiling while stirring.

Add one pouch of liquid pectin. Stir in well.
Add 4 cups sugar slowly while stirring in one cup at a time.

Boil rapidly for one minute.

Pour into sterilized jars/lids and do the step of preserving in a canner if you need to store it more than a month.

I don't do this step because I give it to friends with instructions to use up within one month.


Saturday, January 23, 2021

Gourmet Mexican Rice

At work Wednesday I stood in line for over two hours to get my Covid vaccine booster which made me feel quite ill for over a day.  The first shot did not make me feel poorly but my arm was quite sore for three days.  This time I took Arnica 30c about one hour and again at half hour before the shot.  And again after the shot.  This time my arm was a lot better, but I felt many symptoms of Covid for the following 36 or so hours. But I digress from the subject of the post.

The kitchen manager was with me in line.  We were behind at least 100 others and settled in for a long wait.

I like to get to know people so I began my usual questioning.  My most frequent go-to question is "Where did you grow up?"

"Mexico" was the answer.  And I wanted to know how old he was when he came to the USA.  "Age 20" was the next answer.

Eventually, as the line very slowly crawled along, I found myself asking him if his mom cooked alot..."Yes". And she was a good teacher.  She was and is always cooking food grown on the family farm in Mexico.

"And how do you fix beans?"... This took up a lot of the time and how fun to be learning about cooking authentic Mexican food.  Hopefully a future post will be about trying out what I learned.  I do wish I had something to write it down, but I am fairly sure I can get a refresher at some point.

Hungry for more learning, I asked about Mexican Rice.  I mistakenly called it Spanish rice.

And again, I can't remember everything he said, but today I gave it a go with my own twists and turns...because I wanted to use home made chicken bone broth rather than canned chicken broth.

Aaaaaannnnnddddd my son recently gave me a sous vide.   Really!!!

So the 6 chicken thighs were in the fridge, thanks to my husband who does all the shopping for our household.

I vacuum packed them and put them in the water and using the sous vide at 165 degrees for 1.5 hours they were done just right.  And here is an additional benefit...we left the house with 55 minutes to go on the timer knowing we would not be back in time for it to be done cooking.  We got home a couple hours later and all was well.


When chicken is done in the sous vide, there is a small amount of liquid in the bag which when refrigerated turns to a wobbly gel. It's the collogen and it's good for us.

From these 6 chicken thighs, there was one cup of this liquid and I wanted that for the Mexican rice recipe. The recipe calls for 4 cups broth and to get the other three cups needed, I trimmed the cooked chicken off the bones and put those chicken bones in a pan with 6 cups water and gently boiled them for a couple hours That was about setting number 6 out of 10 on my stove. 

Also, it was supper time so I wanted to eat a piece of this chicken which by this time was medium warm. And I wanted to crisp the outside. With some butter in the pan, I fried the chicken for about 10 minutes on a medium heat. There was more liquid in the pan now and some crispy bits. Which seemed like a great starting point for the rice recipe if you ask me. Add a 1/2 cube butter to the chicken drippings. Now take a large white onion and cut off some. Finely chop it. I did about 1/4 cup and more would have been fine.  Saute in the butter and drippings for about 3 to 5 minutes. 

Using the morter and pestal, I smashed about 10 small garlic cloves and put them in the chicken fat, butter and onions. Saute 🧄 a minute or so, stirring. Add 2 cups white Niko Niko Calrose Rice. Saute until some (half?) are golden. Add one cup collogen and 3 cups bone broth along with 1/2 teaspoon sea salt. Now add 2 scant tablespoons of tomato paste and whisk it in to blend with all the other ingredients. 

Cover the pan and when the lid is hot, turn the heat to a lower setting. I cook it for 20 minutes at a low heat. That is a 3 on my electric stove. 

Ingredient list: 
Chicken drippings from finish browning 6 thighs (already Sous Vide cooked). 
1/2 cube butter 
1/4 cup finely chopped onion 
10 small garlic cloves smashed 
2 cups Niko Niko Calrose Rice 
1 cup chicken collogen 
3 cups chicken bone broth 
1/2 teaspoon sea salt 
2 Tablespoons tomato paste 

optional:

Finely chopped Jalepenos added with onions 

And/or cilantro added after cooking


Sunday, January 17, 2021

DIY Dried Cranberries

 Boil water in large pan.  Turn burner off.  Add 10 ounces fresh cranberries to hot water and let sit 5 minutes while they split open.


With a slotted spoon remove cranberries to mixing bowl containing 2 tablesoons date sugar and one tablespoon coconut oil.  Add a generous sprinkle of sea salt.


Let sit until oil melts then gently stir.


Spread the coated berries onto a cookie sheet.


Place in 225 degree oven.  Stir in one plus a half hour and bake for yet another 1.5 hours.

Cool and refrigerate until ready to use.


Saturday, September 12, 2020

Chicken Soup With Secret Ingredients**


Our son is not feeling so well and I want to take something nourishing and digestible.


AAAANNNNDDDD  I want a record of what I put in it.


9 Chicken Thighs Roasted at 350 degrees for 75 minutes, cool and chop

5 Russet Potatoes Roasted at 350 for 45 minutes, cool and chop


Sautee in one cube butter and a tablespoon of bacon fat

5 carrots diced

1 large Walla Walla Sweet Onion, diced

1/2 Bundle of Celery, diced

One Tablespoon Dried Rosemary **

1 Large Black Fermented Garlic, chopped **

Salt

Turn off heat and add:

1 Tablespoon Bragg Nutritional Yeast Seasoning**

2 teaspoons Raw Coconut Aminos**


Thicken flour and water.


1 lb bacon cooked and chopped 


Add everything together and warm in a pot before serving with corn bread.


Monday, July 6, 2020

Lemon Muffins


Huckleberry Pie, Individual Size


This was the wrong ratio of crust to fruit.   I don't recommend individual pies.


I made a mistake.  I should have tossed the berries with flour before adding in the butter.  
Big whoops.  It turned out okay in the end. 
 But as you can see from the photo above, I had reason to be concerned.


 As you can see from the final photo, I do not recommend making 
fruit pies in Demarle (Now Boncook) silpan products.


As you can see from the photo below, there was a big mess on the oven liner.  
Thank goodness there was one.  But it burned and smoked the house up so much.


To solve this problem, I had the big fans going and doors and windows thrown wide open which of course resulted in an afternoon of fly swatting.

Sunday, June 14, 2020

Brunch Tarts: Hashbrowns, Bacon, Eggs

Today we are going to see a treasured 92 year old friend who is in Hospice care.  She has no appetite.  Her caregivers do.  We wanted to take something to share, but the grocery stock is not as plentiful as I would like.

What DO we have on hand?  Baked potatoes (several), one onion, 3 eggs and some dairy items such as sour cream and whipping cream.  And later in the project, I found some precooked bacon too.  And in the garden, the cilantro is ready.


Years ago I sold French bake ware called Demarle.  Since then it has changed names to Boncook.  A favorite treat for our family is to make individual tarts or pies.  And this thought came to me today.  How fun it would be to deliver savory tarts.  And even more fun if I could use what I have on hand without a trip to the store.


I started with chopping and frying the onion in lots of butter.  When those were golden brown, I added 4 grated baked potatoes left over from last night's supper.  Those too were sauteed until golden brown.

Meanwhile, I started the pie crust from scratch.

7 ounces unsalted butter, cut in chunks.  Very cold!
2 1/4 cups all purpose flour
2 teaspoons salt
1 /2 teaspoon sugar
1 tablespoon raw apple cider vinegar (Bragg's)
1/2 cup ice water

The butter and dry ingredients were cut together with a pastry cutter until the mixture resembled small pea size particles.  Then added the wet ingredients.  Mixing it just until it hung together.

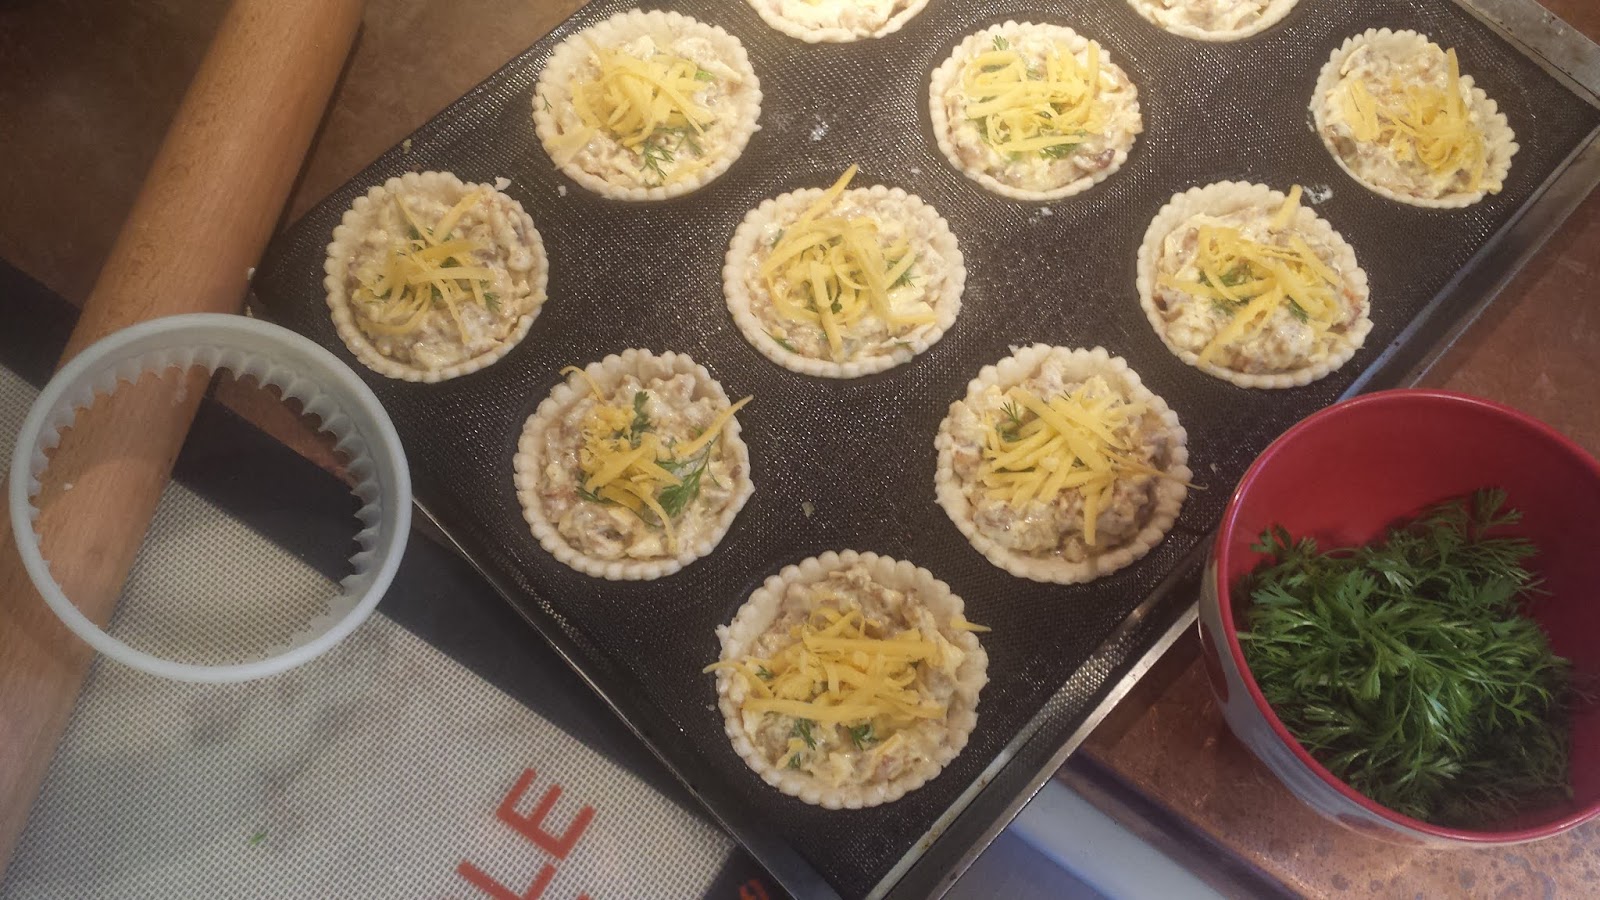
Rolled out and cut with the cutter that matches the Silform tray with 12 individual pie shapes.  I think it's called the large Silform tray.  Mine is years old and it is not currently available on the website.


Here is an equivalent product which I would love to own as well:

https://cindy4bonbite.boncook.com/products/5529-silform-fluted-square-tray-12.aspx

Continuing on with the savory tart filling while the potatoes and onions are frying...

I started placing ingredients in a mixing bowl which included:

3 strips of bacon, precooked and chopped
2 cups grated cheddar cheese
1/2 cup sour cream
3 eggs, 1/4 cup whipping cream
1/4 teaspoon salt
grated pepper

And sent a child to the garden to pick a cereal bowl full of cilantro.

When the potatoes and onions were finished, I stirred those into the mixing bowl too.

Then I filled the 12 individual pie crusts with this filling and topped with cilantro and left over grated cheese.


Oven was set to 375 degrees and were finished baking at 18 minutes.

 Photo below from old cell phone camera
 

Photo below from good camera with good lens.


Monday, May 4, 2020

Lemon Poppy Seed Sourdough Waffles


This is the first waffle off the griddle.  They went like...well...waffles.  I was going to say hot cakes...but you know, they aren't hot cakes.


We made a batch of lemon cream cheese frosting (next photo) to add to the waffles.  
Some of us tried these with regular syrup too and liked it better.

Personally I thought the frosting was too thick and too sweet.  Here is the recipe:

Lemon Cream Cheese Frosting

4 oz. of cream cheese, softened
1 tbsp. of lemon zest
1/4 cup of lemon juice
2 cups of powder sugar
  1. Mix the all the ingredients together until smooth and creamy.

This recipe is rather fantastic as frosting for lemon pound cake.  


Last waffle came off the griddle and we let the frosting melt in.  Ugh!  Too sweet.


The next photo shows the recipe.


Next time I would double the poppy seeds and lemon zest/juice.

And about the lemon glaze for a topping...it was too thick and too sweet for this application.  It was the recipe from the Italian Lemon Cream Cake which is back a couple years on this blog.  And just right for the cake.

We made these waffles because someone important to me wanted to experiment with these particular flavors.  We grew our own poppy seeds.